Table of Contents
- What Rounded-Corner Board Book Printing Involves
- Choosing a Corner Style and Radius
- Standard Rounded Corners versus Custom Shapes
- How Corner Geometry Affects the Finished Format
- Artwork Rules for Rounded Board Book Pages
- Bleed, Safe Areas, Text Placement, and Edge Coverage
- Die Cutting, Finishing, and Quality Checks
- Proofing Rounded Corners Before the Bulk Run
- Rounded Corners Versus Square Corners: Buyer Comparison
- What to Include in a Quote Request
- Frequently Asked Questions
Rounded corners affect more than the appearance of a board book. This guide explains how to select a radius, prepare artwork around the curved trim, choose a cutting method, approve proofs, and provide specifications for an accurate production quote.
What Rounded-Corner Board Book Printing Involves
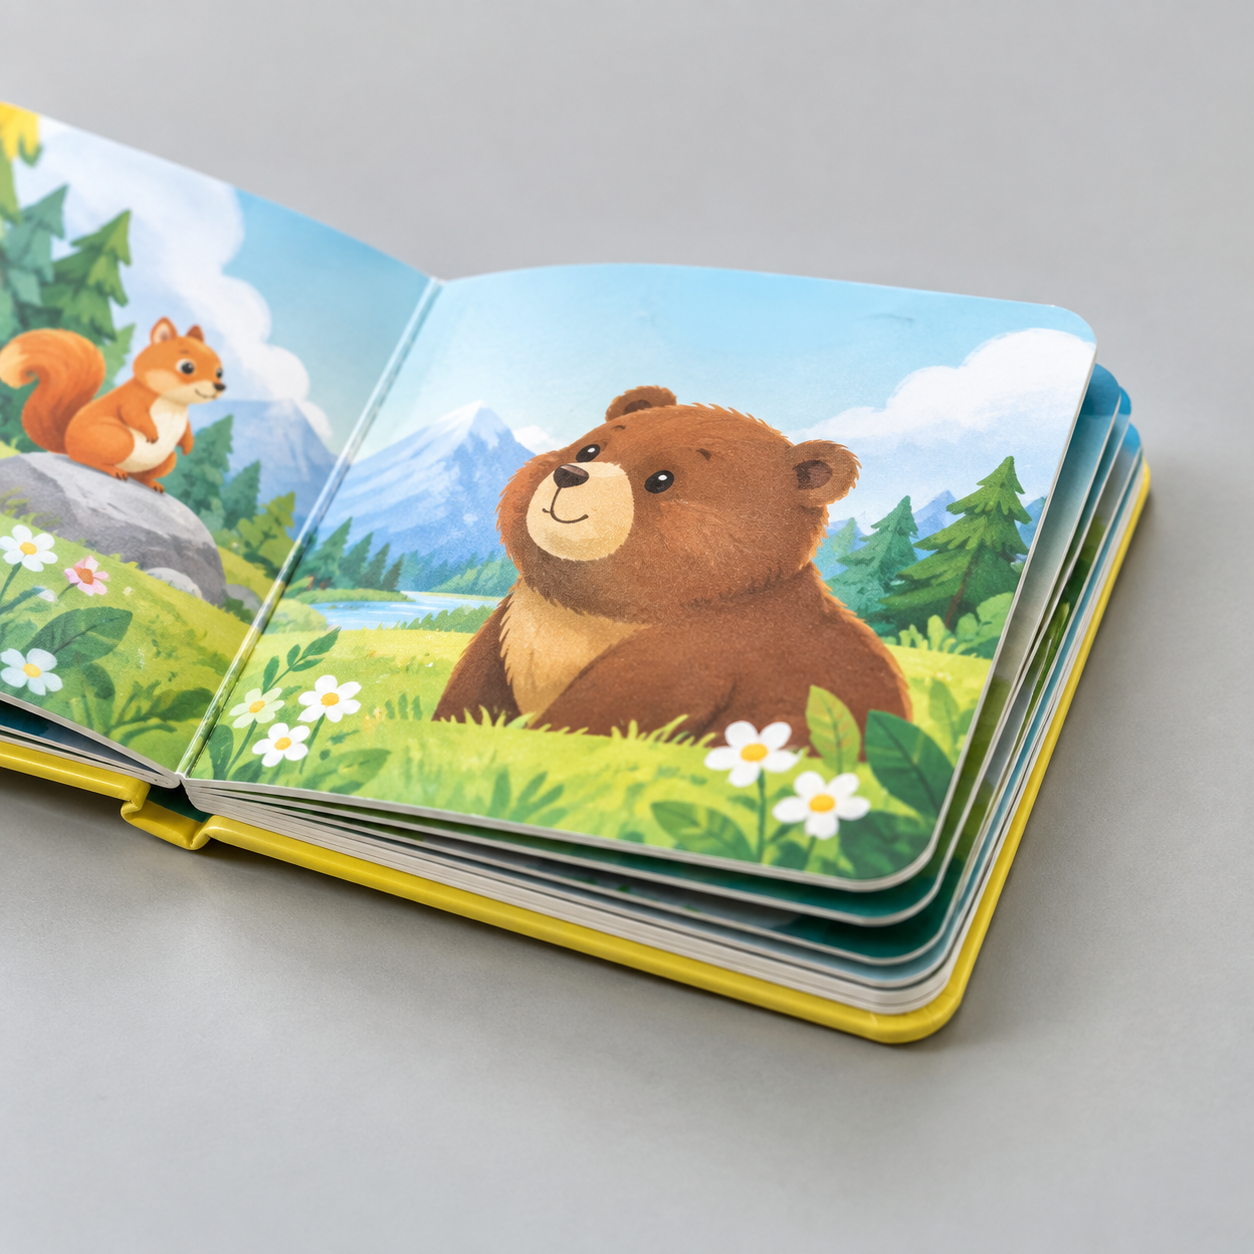
Rounded corner board book printing uses a cutting or corner-rounding process to remove the sharp points from the cover and page block. The radius, book construction, artwork, and cutting sequence must be coordinated before production because thick mounted pages behave differently from ordinary paper.
A radius is the distance from the corner to the center of the circle that forms the curve. A small radius produces a subtle curve; a larger radius removes more of the printed corner. The outside width and height normally remain unchanged, but the curved area no longer exists and cannot carry essential artwork.
Lemon Printing handles prepress, printing, binding, finishing, inspection, packing, and export preparation in-house. The exact workflow is selected after reviewing the book structure and corner specification. Buyers can review the broader custom book printing options before deciding how rounded corners fit into the project.
| Specification | Choices to confirm | Why it matters |
|---|---|---|
| Construction | Self-cover board book, separate cover, or casebound format | Determines which layers are rounded and when cutting occurs |
| Finished size | Width × height after trimming | Controls the imposed page layout and dieline |
| Corner treatment | Standard radius, specified radius, or custom contour | Affects tooling, artwork, setup, and inspection |
| Surface finish | Film lamination, coating, or other approved finish | Changes edge behavior and resistance to handling |
| Page count | State whether covers are included | Board book counting conventions can differ |
Choosing a Corner Style and Radius
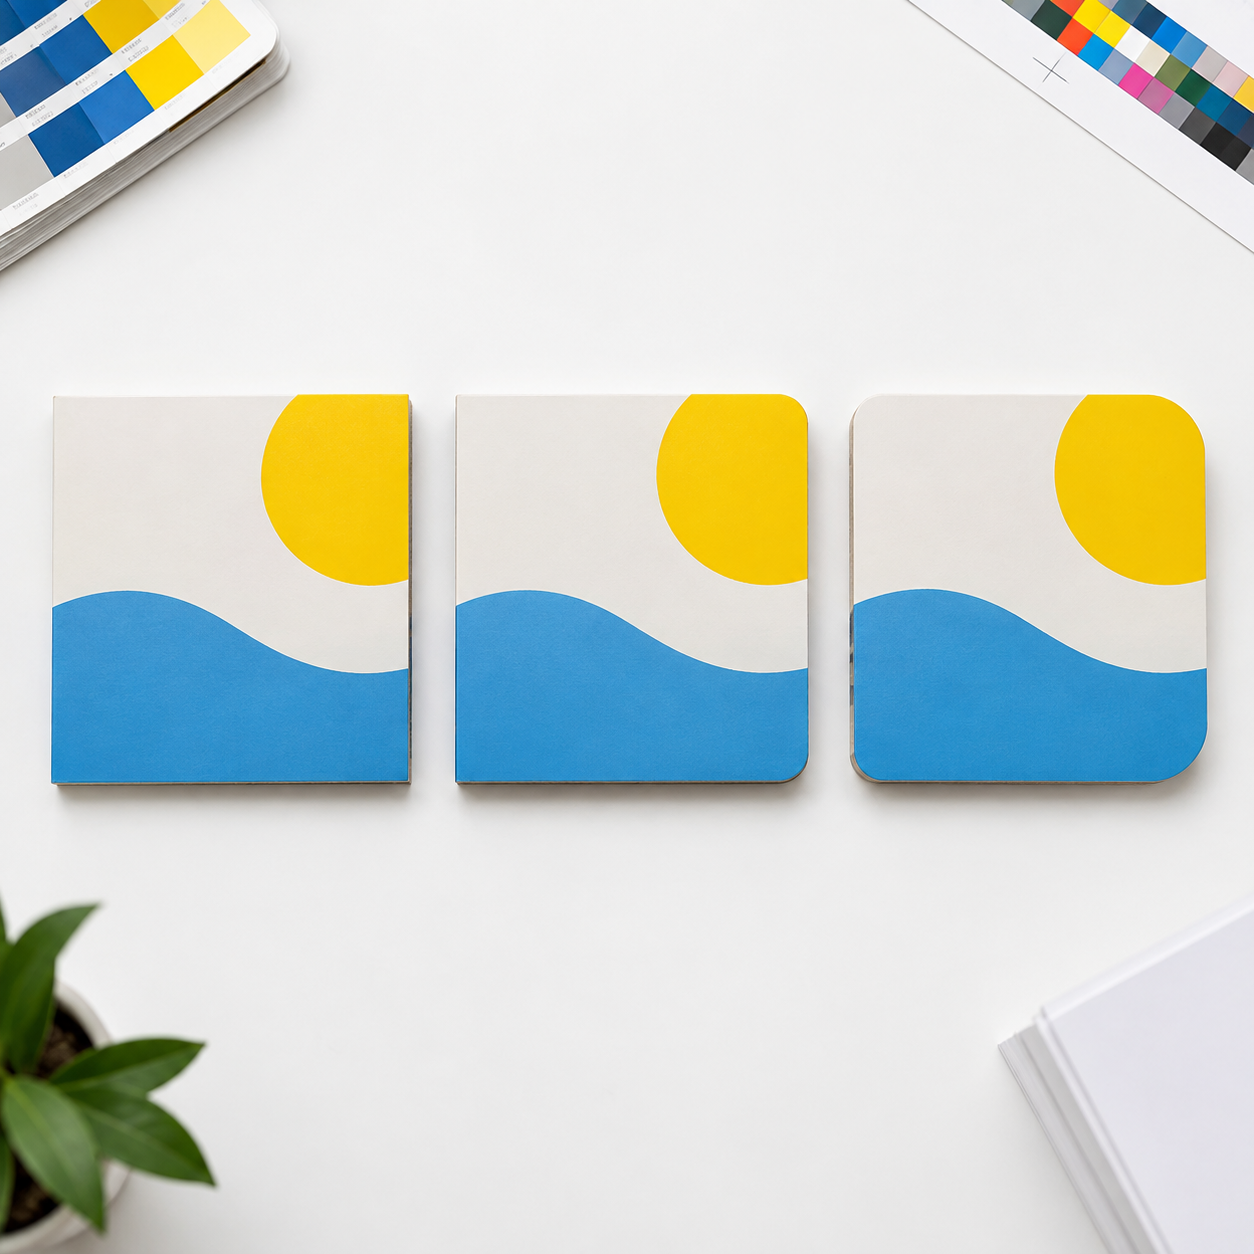
Choose the corner radius according to the finished book size, page thickness, visual design, and intended handling. There is no single radius that is correct for every board book, so the supplier’s available tooling should be checked before artwork is finalized.
For example, an 8 mm radius may appear restrained on a large landscape book but visually prominent on a small square book. The same radius also removes more usable design space from a compact page. Ask the printer to provide a dieline or radius template at actual size rather than approving the choice from a reduced PDF preview.
The decision should address four points:
- Whether the cover and all interior pages use the same radius
- Whether a separate cover extends beyond the page block
- Whether the curve must match another item in a boxed set
- Whether existing standard tooling is acceptable or a custom die is needed
For additional material and construction considerations, see the board book specification guide for US buyers.
Standard Rounded Corners versus Custom Shapes
A standard rounded corner is a consistent quarter-circle cut applied at each corner. It is usually simpler to specify and inspect than a custom contour, especially when compatible tooling is already available.
A custom shape may combine different radii, asymmetrical curves, tabs, or a full outline around the book. That changes the job from corner rounding to shaped board book die cutting. A cutting die and a locked dieline may be required, and the printer must assess narrow projections, internal curves, binding clearance, and the risk of visible layer misregistration.
Do not describe a custom corner only as “soft” or “slightly rounded.” State the radius in millimeters or supply an approved vector path. If a custom profile is essential, ask whether the die will cut individual components or the assembled book because the result and tolerances can differ.
How Corner Geometry Affects the Finished Format
The nominal finished width and height are measured to the outermost straight edges, not across the missing corner. However, the curve reduces the printable area near each corner and can change how covers, page tabs, borders, and background patterns align.
Use one master dieline for every page sharing the same shape. If interior pages are inset from a separate cover, request both the cover dieline and page-block dieline. A border that follows the curved edge can make small cutting variation more noticeable, while a full-bleed image without a narrow outline is generally more forgiving.
Also review the spine-side corners separately. The binding structure may limit the available curve or require different clearance from the hinge. Never mirror an outside corner onto the spine area without the printer approving the geometry.
Artwork Rules for Rounded Board Book Pages
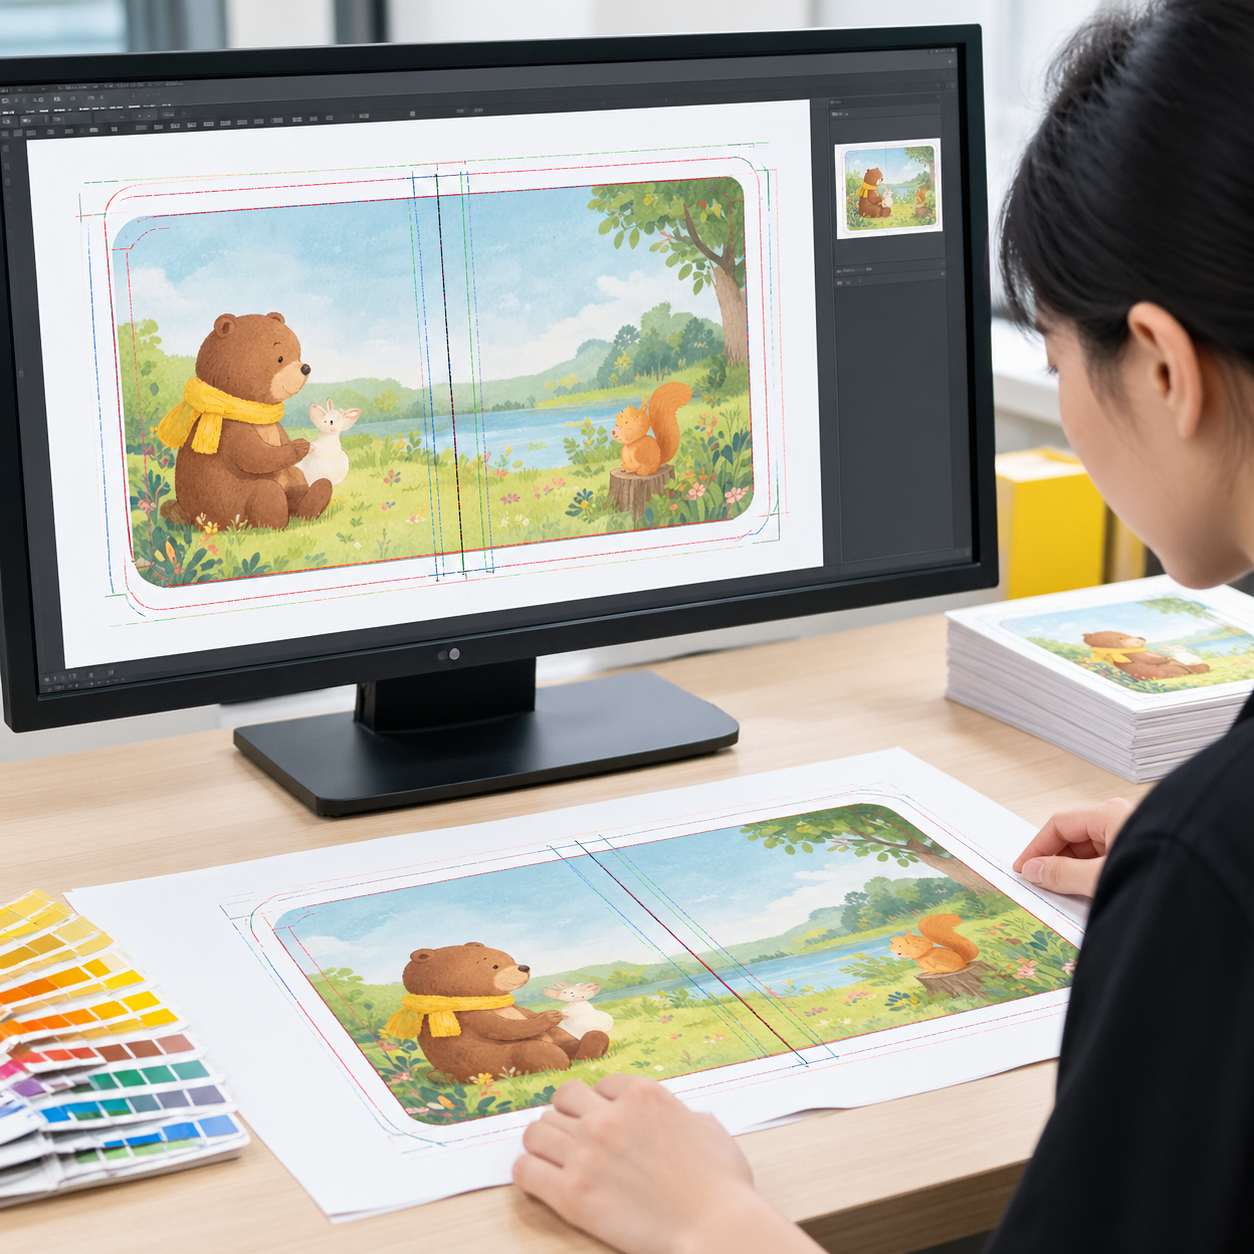
Artwork for round corner board books should be built from the printer’s final-size dieline, with the trim path, bleed boundary, safe area, and binding side clearly separated. The curved cut line should remain a nonprinting vector guide on its own layer.
Prepare pages at final size, use high-resolution images suitable for the intended print process, and convert or define colors according to the printer’s prepress instructions. Keep the dieline as a spot color with overprint settings only if the supplied template specifically requires that setup. Before export, confirm that dielines do not appear in the printable artwork.
Check every spread rather than applying a square-page layout and reviewing only the cover. Repeated corner icons, page numbers, speech bubbles, and decorative frames are common problem areas because one misplaced master-page element can affect the entire book.
Bleed, Safe Areas, Text Placement, and Edge Coverage
Bleed is artwork that extends beyond the final cut line so minor cutting variation does not leave an unintended unprinted edge. A 3 mm bleed is common in commercial printing, but the production template supplied for the specific board book takes priority.
Extend photographs, colors, and patterns past the entire curved trim path, not merely beyond the four straight edges. At a corner, the background must cover the area outside the arc up to the bleed boundary.
A safe area is the zone inside the trim where important content is protected from normal cutting and assembly variation. As a practical starting point, keep text and essential faces at least 5 mm inside the trim, then increase the clearance around a large curve or wherever the printer’s template requires more. The safest corner layout keeps critical content outside the square occupied by the radius.
Review these details before submission:
- No text, logos, page numbers, or essential facial features cross the safe line.
- Full-bleed backgrounds extend continuously around each curve.
- Thin borders are either removed or placed far enough inside the trim to make small variation unobtrusive.
- Left- and right-hand pages use the correct binding-side clearance.
- Knockouts and spot finishes do not unintentionally cross the cut path.
Die Cutting, Finishing, and Quality Checks

The correct cutting process depends on the board thickness, page construction, corner radius, quantity, and whether the book has a standard or custom outline. Production may use dedicated corner-rounding equipment, a steel-rule die, or another approved cutting method.
The sequence also varies. Some constructions are cut as components before assembly; others can be rounded after the page block is assembled. This choice affects alignment between layers, the appearance of the edge, and the inspection method. The printer should confirm the workflow instead of relying on a generic specification.
- Prepress check: Verify finished size, radius, page orientation, bleed, safe areas, and dieline separation.
- Material test: Confirm that the selected board, adhesive, ink, and surface finish remain stable during cutting.
- Setup inspection: Compare the first acceptable piece with the approved dieline or physical sample.
- In-process checks: Monitor corner consistency, page alignment, edge damage, exposed board layers, cracking, and loose lamination.
- Final inspection: Check book opening, page sequence, paired-page registration, cleanliness, and packing condition.
Buyers should agree on measurable acceptance criteria with the supplier, including the approved radius and the supplier’s stated cutting and registration tolerances. Lemon Printing’s printing quality control process provides more context on production checkpoints.
Proofing Rounded Corners Before the Bulk Run
A flat digital proof can confirm content, page sequence, color direction, bleed, and dieline placement, but it cannot fully demonstrate the physical feel or edge quality of a thick rounded board book. Use a physical proof when corner appearance, board thickness, opening behavior, or layer alignment is a purchasing requirement.
The physical proof should match the intended construction as closely as practical. Confirm whether it uses production materials and tooling or is a handmade prototype, because a prototype may show dimensions and assembly without representing final cutting efficiency or bulk-run color.
During approval, inspect the book at actual size and record corrections in one consolidated document. Check:
- The measured radius against the approved specification
- Cover-to-page alignment at all four corners
- Text and image clearance around each curve
- Visible white edges, chipped coating, crushed board, or adhesive residue
- Page order, opening direction, finish, and overall dimensions
The printing proof approval checklist explains how to document approval before bulk production.
Rounded Corners Versus Square Corners: Buyer Comparison
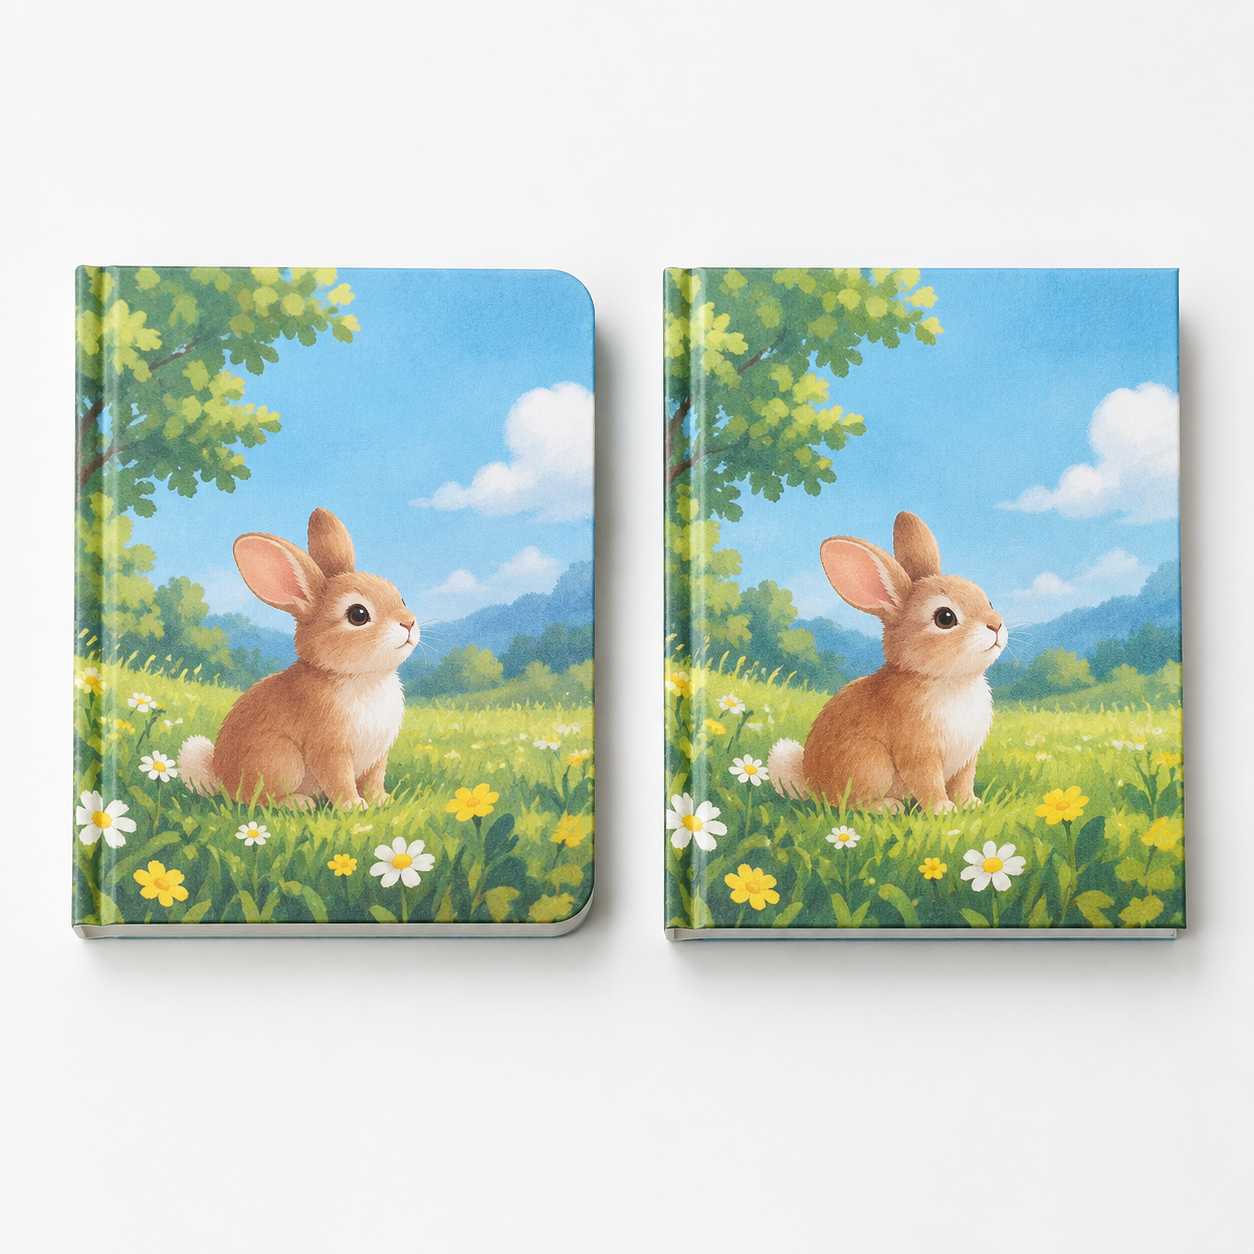
Rounded corners provide a softer edge and a distinct visual format, while square corners preserve the maximum rectangular design area and usually require fewer finishing decisions. The better choice depends on use, design, construction, budget, and production priorities.
| Decision factor | Rounded corners | Square corners |
|---|---|---|
| Edge profile | Removes sharp corner points | Retains a conventional right-angle edge |
| Artwork space | Reduces usable space near each corner | Preserves the full rectangular layout |
| Production | Requires radius confirmation and an additional cutting consideration | Uses standard straight trimming in many constructions |
| Visual tolerance | Narrow curved borders may reveal small registration differences | Narrow straight borders can still reveal trim variation |
| Customization | Can extend to custom contours or varied radii | Limited mainly by finished rectangular size |
| Quoting | May require tooling and proof details | Generally has fewer shape-related inputs |
Rounded corners should not be treated as a substitute for appropriate materials, sound construction, product testing, or compliance review. For products intended for children, the buyer remains responsible for identifying applicable market, labeling, and testing requirements.
What to Include in a Quote Request
An accurate rounded-corner board book printing quote requires a complete construction and delivery specification. “Small board book with rounded corners” is not enough to determine materials, tooling, packing, or freight.
Provide the following information:
- Product type and intended use
- Order quantity and any quantity alternatives to compare
- Finished width and height
- Page count, stating whether covers are included
- Board or paper specification, or a reference sample
- Self-cover, separate cover, or casebound construction
- Corner radius in millimeters, standard tooling preference, or custom vector dieline
- Printing colors and required color references
- Surface lamination, coating, foil, spot finish, or other finishing
- Proof type and any required production sample
- Individual packing, carton, labeling, and pallet requirements
- Delivery destination, target date, and preferred shipping terms if known
Also state which details are fixed and which may be adjusted. For example, accepting an available standard radius may avoid custom tooling, while a radius that matches an existing product may need to remain exact. The printing cost breakdown explains why comparable quotes must use the same specifications.
Final MOQ, production time, pricing, and shipping depend on product specifications, quantity, finishing, and destination. These points should be confirmed in the formal quotation and production schedule.
Frequently Asked Questions
These answers address common sourcing questions about custom board book corners. Project-specific requirements should still be confirmed against the printer’s dieline, material plan, proof, and written quotation.
FAQ
What corner radius should I use for a board book?
Select the radius in proportion to the finished page size and design. Small radii create a subtle curve, while large radii remove more artwork space. Ask the printer which standard tools are available and review an actual-size dieline before deciding.
Do rounded board book corners need bleed?
Yes. Any background intended to reach the edge must extend beyond the complete curved trim path. A 3 mm bleed is common, but the printer’s supplied template is the controlling requirement for the job.
Can the cover and interior pages have different corner radii?
They can in some constructions, particularly when a separate cover extends beyond the page block. The two shapes must be specified separately, and the printer should confirm binding clearance, alignment, tooling, and the intended visual result.
Is corner rounding the same as board book die cutting?
Not always. Corner rounding generally refers to cutting a consistent circular radius at the corners. Die cutting can create a complete custom outline, asymmetrical corners, tabs, or other shapes using purpose-made tooling.
Can a PDF proof accurately show the finished rounded corners?
A PDF can show the corner path, bleed, safe area, and artwork placement. It cannot fully reproduce board thickness, edge quality, opening behavior, or alignment between physical layers. Request a physical proof when those characteristics are important to approval.
Do rounded corners make a children's board book compliant or safe?
Rounded corners remove sharp corner points, but they do not establish product compliance by themselves. Materials, construction, labeling, age grading, testing, and destination-market requirements must be considered separately by the buyer and qualified testing providers.
Do rounded corners increase board book production cost?
They can add setup, cutting, tooling, proofing, or inspection requirements, especially for a custom radius or full die-cut shape. The actual effect depends on the construction, quantity, material thickness, available equipment, and finishing specification, so it should be evaluated in a project-specific quote.
Request a Rounded-Corner Board Book Quote
Send Lemon Printing your product type, quantity, finished size, page count, preferred board or paper, construction, corner radius or dieline, surface finishing, packing requirements, delivery destination, and target date. Reference photos or an existing sample are useful when the corner must match another product. Lemon Printing will review the specification before confirming the applicable MOQ, production time, pricing, and shipping options.